Deploy your Adonis website
People often assume that any developers must know how to deploy an application to a remote server. The real case is that a lot of people aren't comfortable to push a website to production.
This article uses the Node.js framework AdonisJs as an example, but the concept you'll learn is the same for any node-like languages or frameworks.
Step 1: Create a Server
The first thing to do is to create a server. Let's assume that you don't have any VPS (Virtual Private Server) available and need to get one. I'm using the service Digital Ocean to host my server, but any VPS could do it.
In the Digital Ocean "Create a Droplet" page, I'm choosing the latest version of Ubuntu and the smallest server I can have. This server will be sufficient to run multiple Adonis application.
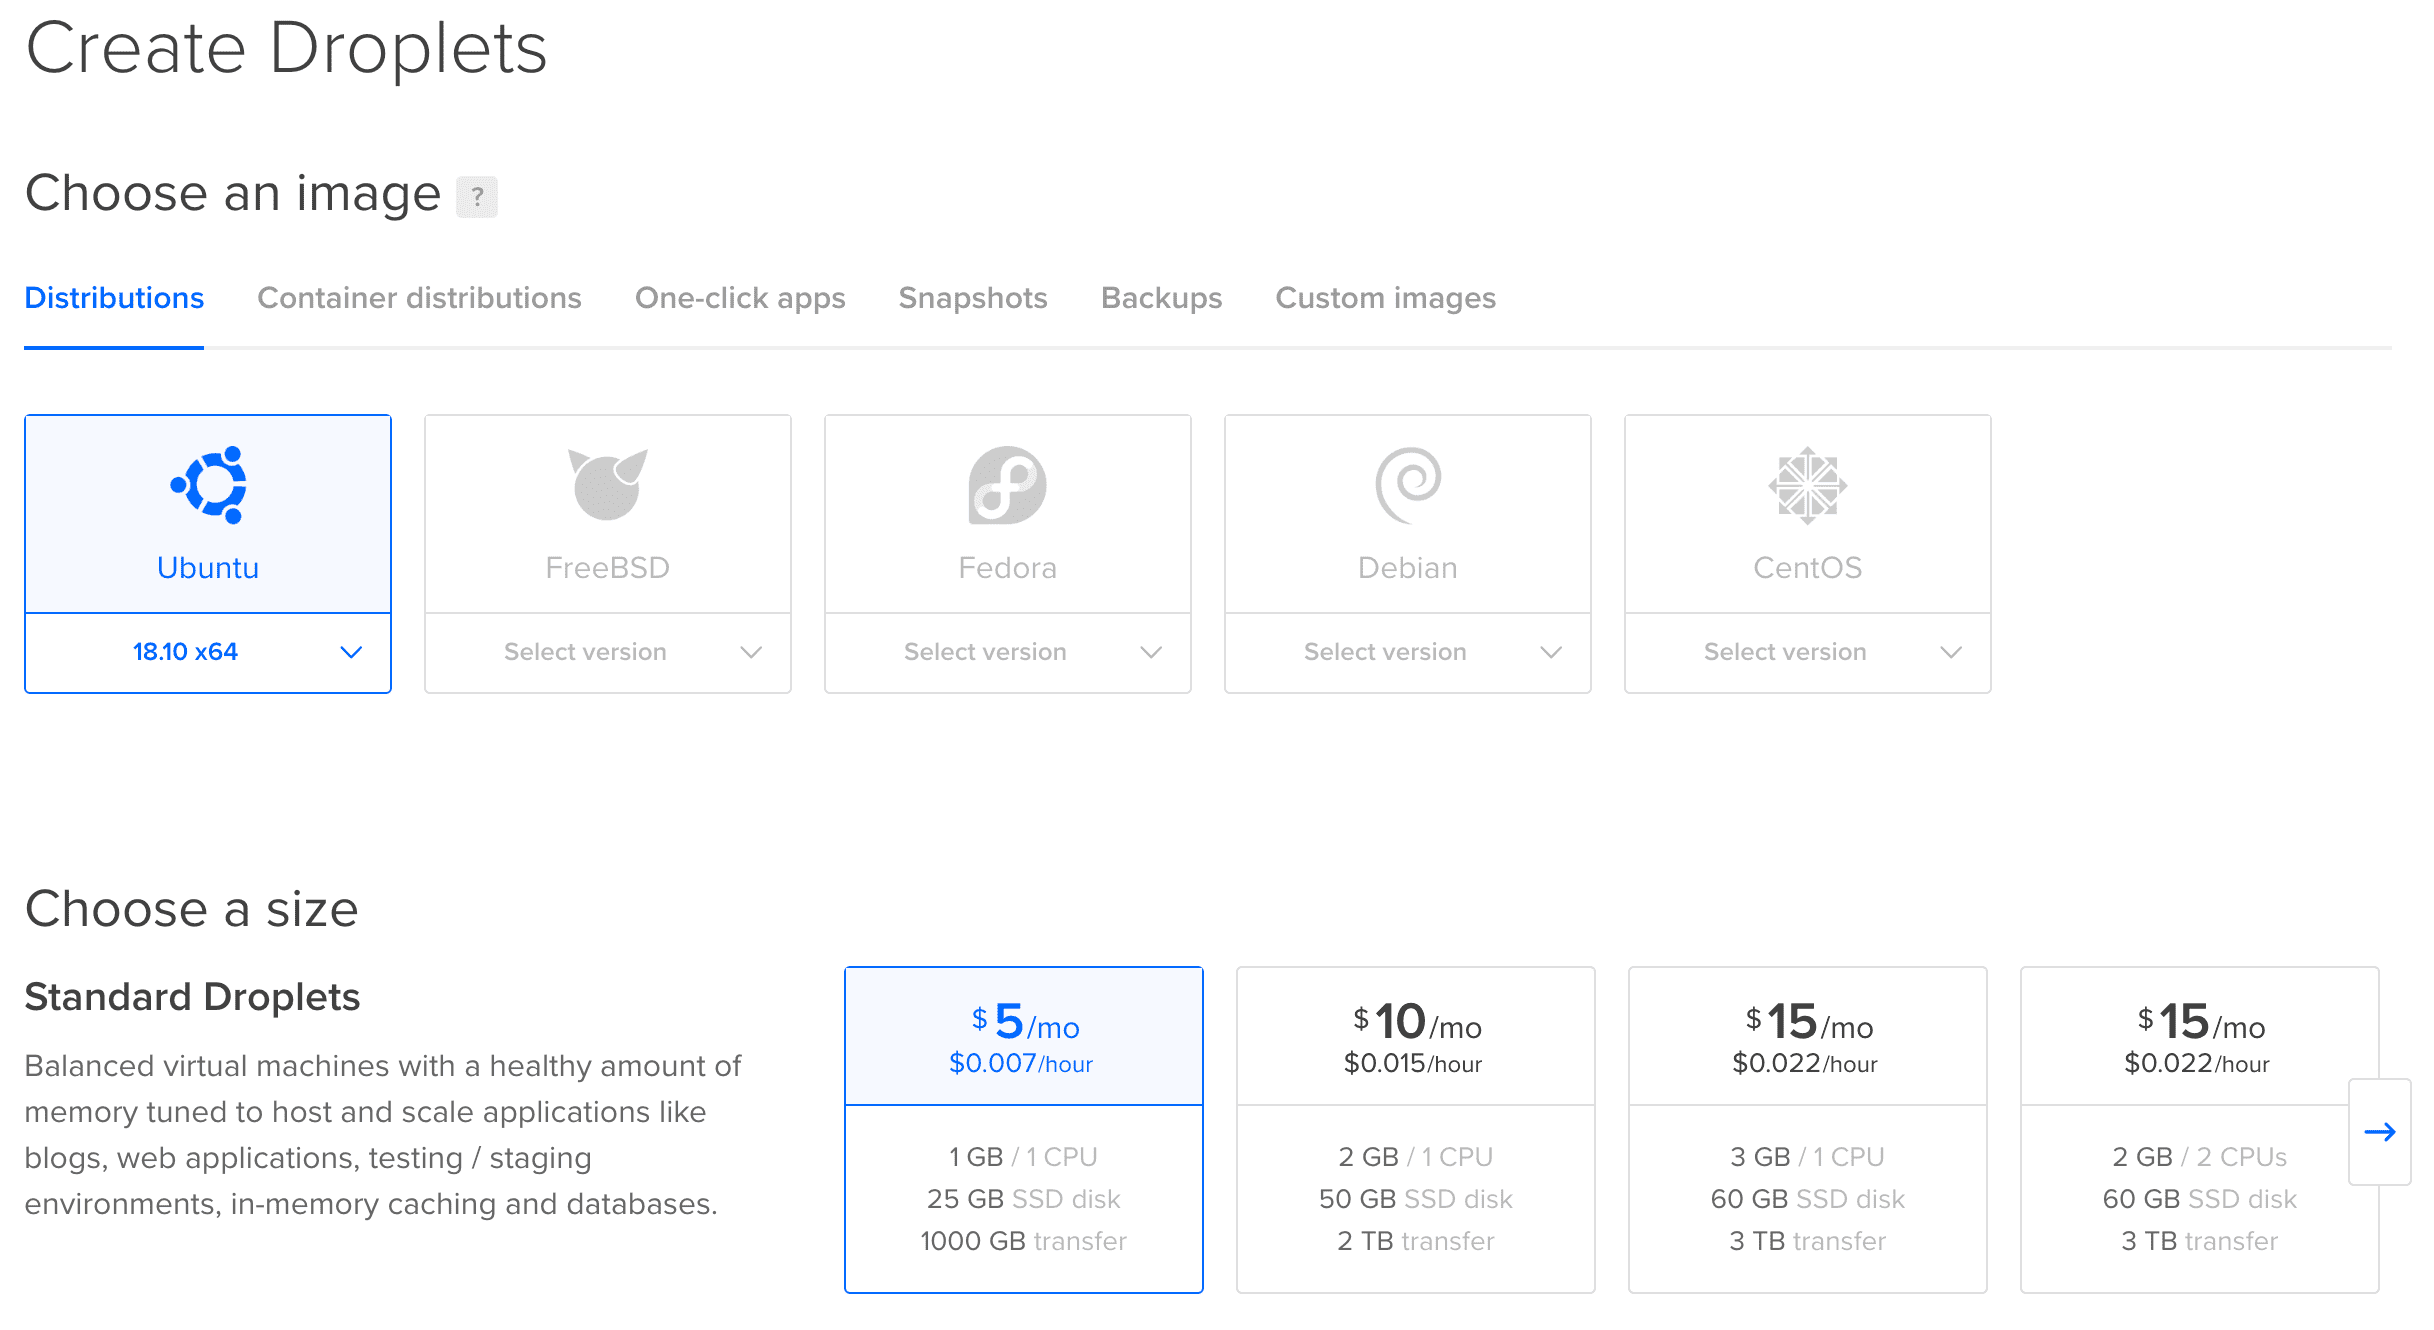
You can leave the other settings by default, ensure to select a region that is near your target audience.
Step 2: Secure Your Server
When your VPS is created and available use SSH to connect to it.
> ssh root@IP_OF_YOUR_DROPLETOnce connected, the first thing we will do is secure the server.
Change The root Password
Type the command passwd and change the password to something long and complicated. You don't need to remember it when you will work on your server. Store it somewhere secure.
Update Your Server
Even if you just created your server, it may be not up-to-date. Simple run the following command:
> apt update
> apt upgrade
Enable Automatic Security Updates
Security updates are critical and can be automated. There's no need to connect to all of your servers every day to run a simple apt update & apt upgrade command to fix security holes.
> apt install unattended-upgrades
> vim /etc/apt/apt.conf.d/10periodic
Update the configuration file to look like the following:
APT::Periodic::Update-Package-Lists "1";
APT::Periodic::Download-Upgradeable-Packages "1";
APT::Periodic::AutocleanInterval "7";
APT::Periodic::Unattended-Upgrade "1";
Install fail2ban
fail2ban is a service that scans logs of your server and bans IP that shows malicious behaviors (like too many password failures, port scanning, etc.).
> apt install fail2banThe default configuration is fine for most people but if you want to modify it, feel free to follow their documentation.
Create Your User
You should never work with the root user; it has full control without any restrictions that may put your system at risk. I'm using the username romain, feel free to change it.
> useradd -m -s /bin/bash -G sudo romain
> passwd romain
> mkdir /home/romain/.ssh
> chmod 700 /home/romain/.ssh
The commands above have created a new user with the username romain, created its home directory and added it to the sudo group. Now we can add our SSH key to be able to connect to the server with this user.
> vim /home/romain/.ssh/authorized_keys
> chmod 400 /home/romain/.ssh/authorized_keys
> chown romain:romain /home/romain -R
Before you continue, verify that you can connect to your server with this user.
> exit  # Quit the SSH session
> ssh romain@IP_OF_YOUR_DROPLET
Then run the following command to verify that you have access to root commands.
> sudo whoami # Should display rootLockdown SSH
By default, SSH allows anyone to connect via their password and to connect as root. It's a good practice to disable this and only use SSH keys.
> sudo vim /etc/ssh/sshd_configSearch and modify the following lines to change the configuration.
PermitRootLogin no
PasswordAuthentication no
Change the SSH Port
I like to change the default port of the SSH service. We have fail2ban to protect us against login brute-force, but it would be even better if we avoid them.
Nearly all bots that will try to brute-force the login system will reach SSH with its default port, which is 22. If they don't detect that this port is opened, they will leave your server.
Still in the /etc/ssh/sshd_config file change the following line:
Port XXXXXChoose a port from 49152 through 65535. It's the dynamic and private range of available ports.
Then you can restart the SSH daemon, exit the current session and connect again with your user.
> sudo service ssh restart
> exit # If you aren't disconnected
> ssh romain@IP_OF_YOUR_DROPLET -p XXXXX
UPDATE: It seems that changing the default SSH port could be a bad idea for some reasons. You can read more about those in this article.
Install a Firewall
Ubuntu comes bundled with the great firewall ufw. Let's configure it.
> sudo ufw default allow outgoing
> sudo ufw default deny incoming
> sudo ufw allow XXXXX  # It's the port you used for your SSH configuration
> sudo ufw allow 80
> sudo ufw allow 443
Be sure to have correctly allowed the SSH port. Otherwise, it will lock you out of your server!
Finally, enable the firewall using the following command:
sudo ufw enableStep 3: Create a Deploy User
Now that your server is secured, and you have a personal account on it, we can create a deploy user that will be used by any administrators of your server to deploy and run your website.
> sudo useradd -m -s /bin/bash deployWe don't need to set up an SSH key for this user since no one will connect directly to it. You will be able to access this user using the following command:
> sudo -i -u deployStep 4: Install Required Dependencies
Nginx
Nginx will be our web server. We use it to proxied any incoming HTTP(S) requests to a local port.
> sudo apt install nginxDatabase Management System
An application often uses a DBMS to store data. We will use MariaDB in this article. Run the following command to install it and then follow the configuration wizard.
> sudo apt install mariadb-serverNVM
At this time, you need to be connected as your deploy user.
NVM is a Node Version Manager. It will help us install and keep up-to-date the Node.js version we use.
> curl -o- https://raw.githubusercontent.com/creationix/nvm/v0.33.11/install.sh | bashThen adds the following lines to your profile (~/bash_profile, ~/.zshrc, ~/profile, or ~/.bashrc):
export NVM_DIR="${XDG_CONFIG_HOME/:-$HOME/.}nvm"
[ -s "$NVM_DIR/nvm.sh" ] && \. "$NVM_DIR/nvm.sh" # This loads nvm
After doing this, you need to restart your shell to have access to the nvm command. When it's done, you can install the latest version of Node.js using the following command:
> nvm install nodePM2
PM2 is a Node Process Manager that will be used to keep our application alive forever.
> npm install pm2 -gStep 5: Deploy Your Application
It's time to clone your repository to get our application on the server! I highly recommend you to use a deploy key to deploy your application. It will allow your server to pull the code but never push it.
Once you have set-up your SSH deploy key following the documentation of your git provider, clone the repository inside /home/deploy/www.
> cd ~  # This takes us the the home folder of the current user
> mkdir www
> cd www
> git clone https://github.com/adonisjs/adonis-fullstack-app.git example.com
> cd example.com
> npm i --production
Clone your .env.example file and change values according to your setup.
> cp .env.example .env
> vim .env
It's time to run your migrations and seeds.
> node ace migration:run --force
> node ace seed --force
Test that your application runs without any issue by using the following command:
> node server.js # Followed by Ctrl+C to kill itStep 6: Configure Nginx
You can reach your application in your server local network, but it would be better to allow external visit! This is where reverse proxy enter on the dancefloor.
This need to be done with your user, romain in my case.
First, delete the default configuration and create a configuration file for your website. I like to name them with their URL, example.com here.
> sudo rm /etc/nginx/sites-available/default
> sudo rm /etc/nginx/sites-enabled/default
> sudo vim /etc/nginx/sites-available/example.com
The configuration will tell Nginx to listen for an incoming domain and forward all requests to a local port, your application.
server {
  listen 80 default_server;
  listen [::]:80 default_server;

  server_name example.com;

  # Our Node.js application
  location / {
    proxy_pass http://localhost:3333;
    proxy_http_version 1.1;
    proxy_set_header Connection "upgrade";
    proxy_set_header Host $host;
    proxy_set_header Upgrade $http_upgrade;
    proxy_set_header X-Real-IP $remote_addr;
    proxy_set_header X-Forwarded-For $proxy_add_x_forwarded_for;
  }
}
The last thing to do is to enable this configuration and launch your application.
> sudo ln -s /etc/nginx/sites-available/example.com /etc/nginx/sites-enabled/example.com
> sudo service nginx restart
> sudo -i -u deploy
> pm2 start /home/deploy/www/example.com/server.js --name app
If you have set up your DNS correctly, you should have access to your application. Otherwise, since we used the default_server directive in our listen command, your application will be displayed by default when hitting the IP of your server.
Step 7: Automate Via a Script the Deployment
Now that our application is running in production we want to create a script to automate future deployments.
> vim /home/deploy/www/deploy-example.shThis script will simply do what we have done before:
- Pull new changes from your repository;
- Install new dependencies;
- Run migrations;
- Restart the application.
# Content of your script
cd example.com
git pull
npm i --production
node ace migration:run --force
pm2 restart app
Add the x flag to be able to run it.
> chmod +x /home/deploy/www/deploy-example.shNow when you want to publish a new release run the script deploy-example.sh with the deploy user.
Step 8: Add SSL Certificate
The last thing to do is to add an SSL certificate to secure the connection between clients and our server. We will use certbot which will automatically enable HTTPS on your website deploying Let's Encrypt certificates.
> sudo add-apt-repository universe
> sudo add-apt-repository ppa:certbot/certbot
> sudo apt update
> sudo apt install python-certbot-nginx
Then, run certbot and follow the wizard to generate and set up your certificate.
> sudo certbot --nginx--
Thanks to Etienne Napoleone for his proof-reading.
